Singlet Grocery Tote

 I have a confession to make. Sometime I start a project and it never gets done. Some folks call these UFOs:Unfinished Objects, some WIPs: Works in Progress. What ever you call them, at some point in time you need to finished them, throw them away or donate them to another fool. Yesterday I spent the entire day moving, cleaning and reorganizing my multi craft room. I found a lot of unfinished items.

This particular unfinished project was started back in December of 2008. I wanted to make reusable bags for all of our gift giving. The tutorial up at Craftster is amazing.  I started out great, made a prototype, finished it . Then I decided to make 25. The difference between one and twenty-five is HUGE. Just washing and ironing all of the fabric took a day.

Well it is now the spring of 2010 and I finished 15 of the bags today (where are the other 10?? I am not sure). I simplified and skipped steps and used my serger. They don't fold up cute and fit into a pocket because they don't have that pocket.


I did the side and bottom seam differently, mostly because I wanted to experiment with some bottom/side finishes.
To make the triangle fold in the side seam you sew the bottom seam first then you fold the bottom seam up an inch so that the bottom seam is caught up in the side seam. 
When you flip it RS out you have this cool triangle flap. I had to do this 3 times before I got it right. My first time the flap ended up on the bottom, then  then second try was still not right. Third time a charm.


As a Stash Buster this is truly great, I used about 3/4 of a yard for the exterior and 3/4 for the lining. It is perfect for all the weird novelty fabrics you purchase for a special someone, then you don't know what to make with the strange turkey, cartoon, frog, Strawberry Shortcake fabric.


Mother's Day is right around the corner and I know what my moms will be getting.

Our Front Garden

We are working towards an edible landscape in the front yard for us and for the birds and butterflies. Last year we had beautiful tomotoes in the very front of the house, right up by the street. We replaced the tomatoes with blueberry bushes, apple trees, pomegrante, strawberries and a BUNCH of flowers.

We need to start pruning and shaping these brand new apple saplings. Research has been done, we need to create a good crotch in the trees, so they will be able to bear the weight of their fruit.
This look like lot of green. In the background are daylilies, some lavender and a bright pink perenial that I swapped seeds for. To the very right is out new Pomagrante, it is more like a shrub than a tree.
Second year Holleyhocks. Can't wait to see how they look.
Love the pink dianthus.


Bachelar Buttons. I am not sure when these were planted they must be from the seed mix I put out last year.
Strawberry plants from last weeks farmers' market. Not sure if we will be harvasting these or they will just be ground cover.
Bronze Fennel, which is official an annual but this is the orginal plant I put in the ground last year. Maybe it is a half hardy perennial. The butterflies are supposed to like it.
These are lots of plants, but most are daisies. I got hundrends of their itty bitty seeds last fall at the farmers' market.

"Stash Buster" Zippered Wallet


Got right on this tutorial since Dollar Store Crafts stash busting event wraps up on my husband's birthday, I mean Earth Day.

1/2 inch Seam Allowance.
Supplies Needed
Scraps of cotton fabric
7 inch zipper
Split ring
Pellon Fusible Fleece

Using Scraps cut the following:
Front top
4 x 8 Cotton
2 x 8 Fusible Fleece
Front Bottom
8 x 8 Cotton
4 x 8 Fusible Fleece
Middle Divider (optional)
11.5 x 8 Cotton
Back
12 x 11.5 (or 2 pieces 6 x 11.5) Cotton
No Fleece in back.
Strap
3 x 8 Cotton

Fuse the Fleece (refer to manufactures' instructions) to the top & bottom front pieces.
Fold the top & bottom front pieces over the fleece and press.
Fold the Middle divider in half  (4 x 11.5), press & top stitch.
Fold the 12 x 11.5 in half (6 x 11.5), if you cut two pieces just lay them out WST.
For Strap fold in the raw edges, press and top stitch both long sides of strap (.75 x 8).
Putting in the zipper! Don't sweat this, I did not even use a zipper foot. The fleece give the 2 front pieces some depth which makes it easier to sew in the zipper.
Place the finished edge of the bottom front piece up right next to the zipper teeth. The zipper tape should be 8 inches long just like your front piece. Slowly sew down the edge of the fabric about 1/8 inch away from the zipper teeth.


AS you get close to the zipper pull, put your needle in the down position.
Lift the presser foot.
Use a chop stick to push the zipper pull past the presser foot. Some zippers will only move if the pull is going in the correct direction, so if you are struggling just flip the pull over and try again.
Lower the presser foot and continue to the edge of the fabric & zipper tape.
Line up the  finished edge of the top front piece with the other side of the zipper and repeat.

Zipper Done!

Make a sandwich with most of your parts.
Lay the front piece with finished zipper down first.
Layer the folded back piece or the 2 6 x 11.5 back pieces, ALIGN to one of the short sides.
add the folded divider align to the same short side and to the bottom.
THE BACK PIECES ARE LONGER THAN THE FRONT.
Sew the sides with the zipper side UP!!! Sew one of the short sides. Watch out for the metal ends of the zipper. You should miss them, but move past them slowly cause they will snap your needle right off.

There will be a bump in the back fabric.

 Trim (if needed) and finish the seam. I used my zig zag stitch.
Look, the edges of the back poke out and you can see them from the front.

If you were to flip it to sneak a peak, this is what it would look like . BUT don't do it cause you will just have to flip it back to finish it up.
Put the strap into the split ring then slide into the sandwich, pin to the front top on the same side as the zipper pull when the zipper is closed.
Please note that the slightly wider back is folded and extends past the front pieces.

Pin the top and the bottom. This is a view from the back.
Here is view of the front.
!!! Make Sure the zipper is open before you continue to the next step!!
 Sew the top and bottom egde. Finish the seams.
Turn right side out. Poke out the corner.
I added a few strands of dmc floss to make a zipper tassel.
All Done.

In retrospect: for my next tote and wallet I will make the wallet first and then attach it to the top edge  with 2 straps from the top of the wallet, while I construct the overall tote. I will not need the ring and clasp. OR if I really want to have the wallet removable I will shorten the straps, cause as it is now constructed the wallet will drop into the bottom of the bag and perhaps end up under my veggies.

Far Far Away - Heather Ross

How cool is my hubby. It is important that he use his video skill for the good of all (fabric;-)).

"Stash Buster" Farmers' Market Tote

Using up lots of fabric here. This weekend I decided I needed a new tote bag for the farmers' market. I love our "Save the World" tote bag, which is great for the grocery store. The STW bags is tall and when I take it to the farmers' market I kinda crush the veggies in the bottom of the bag, plus I lose my money & keys in the depths.

What I need in my new tote:
A shortish bag - so I can't overload it and crush the lettuce.
A wide base / bottom.
Stiff sides so the bag does not collapse and will stay upright when placed it on the ground to pack up yummy fresh veggies.
A few clips that I can attach my keys and a yet unmade wallet to.

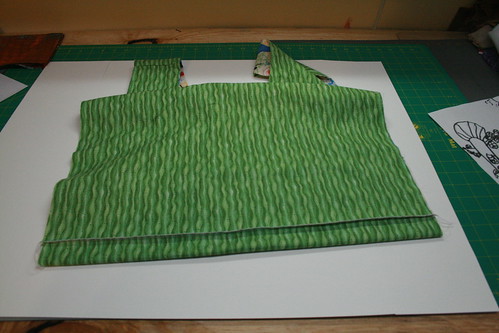
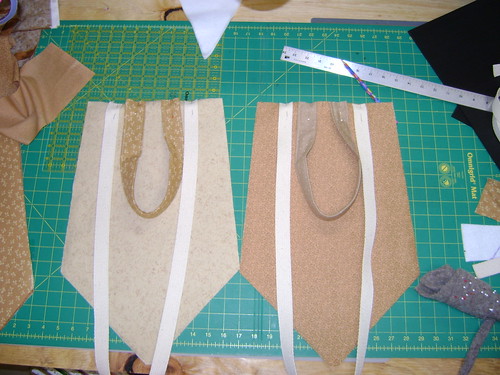
I made one early this am which met most of the requirements but it was not quite what I wanted (a craft fail).
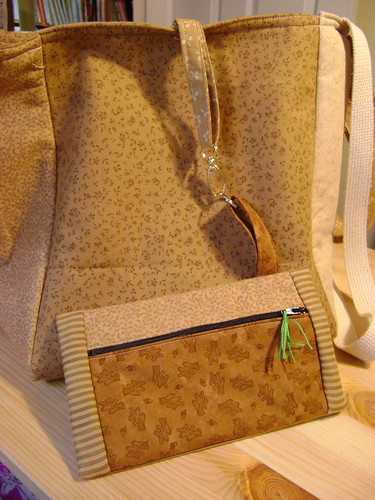
Made some modifications after lunch and I am pleased with the results.

Please remember I am stash busting, at one point in my sewing life I was certain that I would love primitive quilting and only wanted to work in browns. I have a lot of brown fabric. Some of this fabric dates back to the Moda Quilt challenge of 2004 (?).

Supplies Needed:
8 Fat Quarters or equivalent fabric (about 2 yards).
1 yard Pellon Fusible Fleece
Walking foot on Machine
Optional
Cotton Strap Webbing
Swivel Clasp

1/2 inch seam allowance


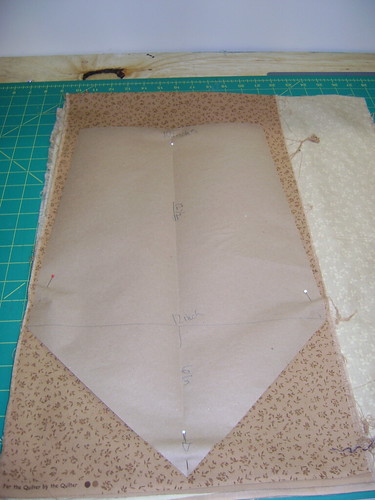
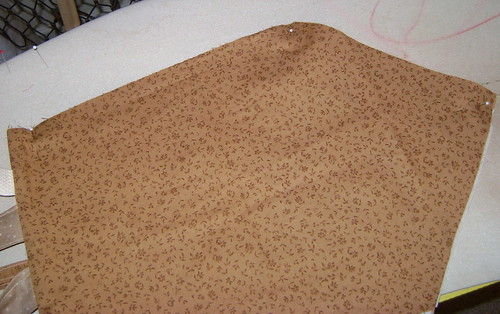
Make your pattern! The pattern is super simple.
Fold a 18 x 20 pieces of paper in half.
At the top of the paper measure 5 inches from the fold. Mark it.
Measure down the fold 12.5 inches. Measure out from that point to 6 inches. Mark it. Draw a line from the 5 inch mark at the top to the 6 inch mark 12.5 inches below.
Using the 45 degree angle marks on you cutting mat and a straight edge. Mark the 45 degree angle from the 6 inch mark to the fold. (the length after the 12.5 inch mark to the tip of the pattern in about 6 inches).
Cut out your pattern.
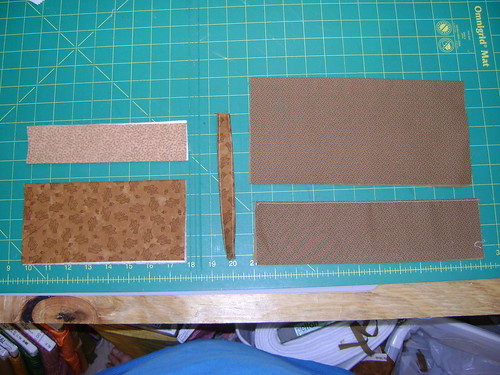

From Pattern
Cut 8 of quilt cotton.
Cut 4 of Fusible Fleece.
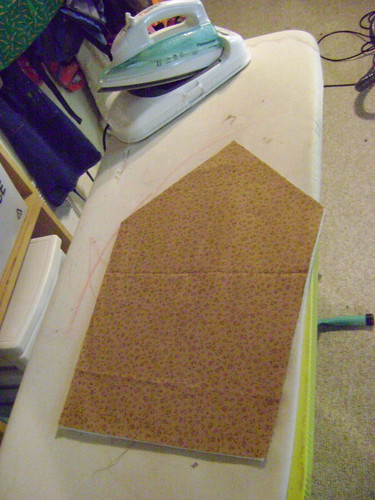
Press Fusible fleece onto the wrong side of 4 cotton pieces following the manufacturers instructions.

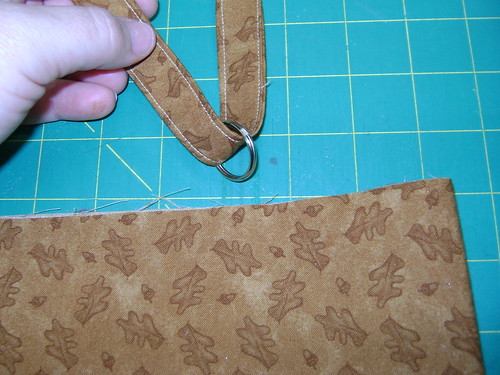
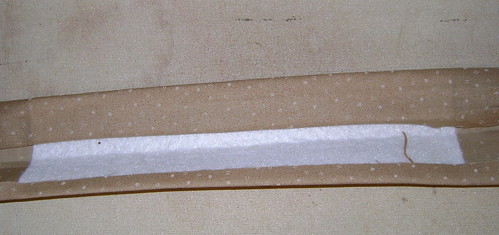
From scrap cotton cut 2 straps 5 x 15
cut 2 fleece pieces 4 x 6
Fuse the fleece into middle of the wrong side of the strap fabric.
Fold the fabric in to hide the raw edges and top stitch down.

From the cotton strap webbing cut two longer straps. I measured from my waist over my shoulder to my waist again (about 40 inches). I think it may be too long. I am going to drop it back to 30 inches on the next one.

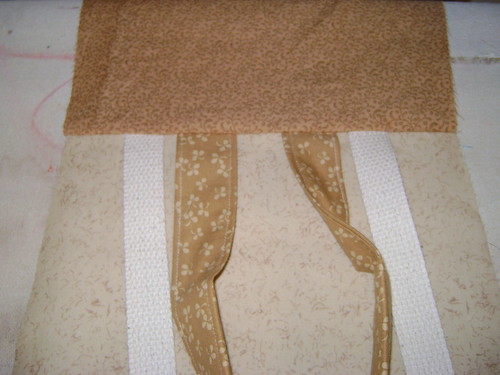
Take 2 of the cotton and fleece piece to a flat surface.
Mark the center top of both pieces.
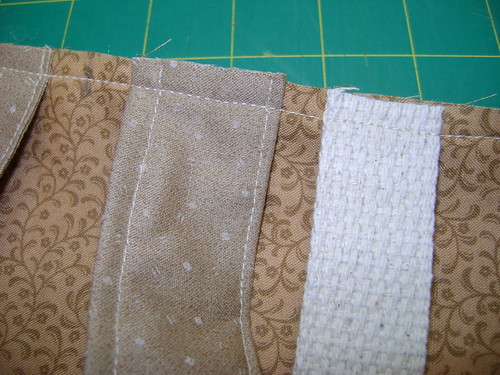
Pin the short fabric straps .5 inches away from the center mark.
Pin the longer straps. 5 inches away from the fabric straps.
Stitch the straps down.
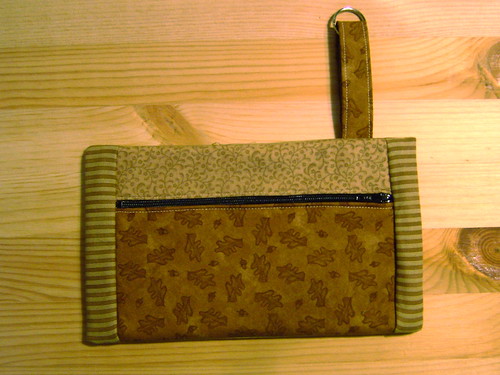
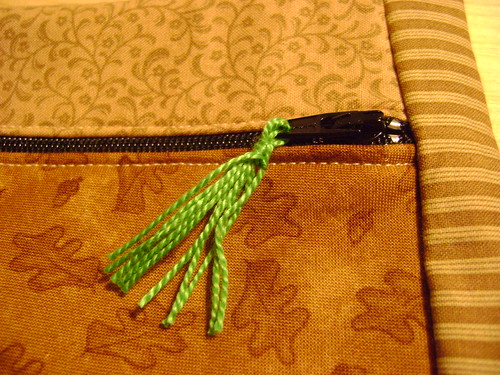
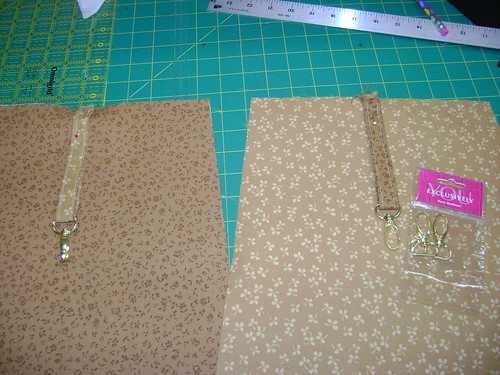
Optional Step:
Cut a 3 x 8 ish length from 2 other scraps of cotton.
Fold in the raw edges and top stitch.
Slide the strap into a swival clip and pin into the center of the remaining 2 cotton/fleece pieces.
Stitch in place.

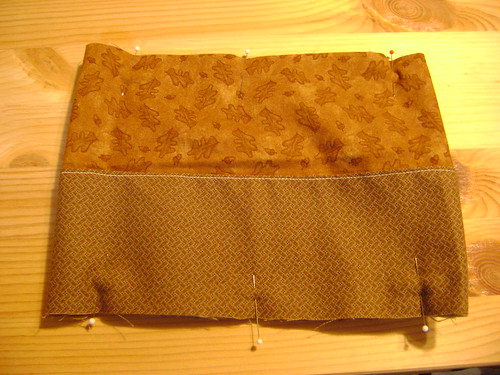
Take a plain piece of cotton and a cotton / fleece piece.
WST line up the top edge.
Sew across the top 1/2 inch from the raw edge.
Open, flip RS out press down.
Repeat 3 more times.
You now have four side with a finished top.

Take 2 pieces, one with straps, one with a clasp.
Lay them on top of each other. MAKE sure that the fleece cotton piece in on the inside.
Start stitching at the finished top edge BACK STITCH.
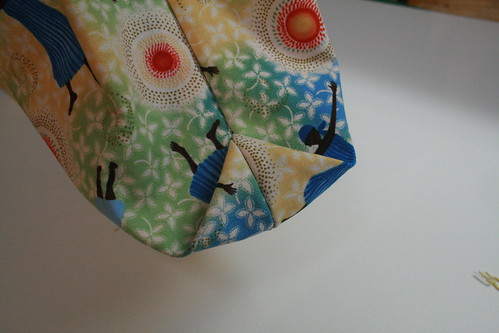
Pivot at the corner and then sew off the bottom point.
Repeat with other 2 pieces. Make sure you sew both side the same way.

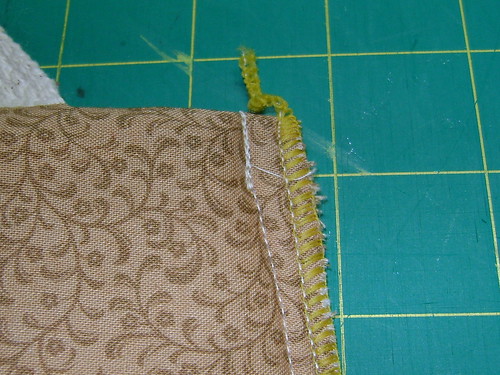
 Finish the side seam. I used a serger. A zig zag stitch will also work.
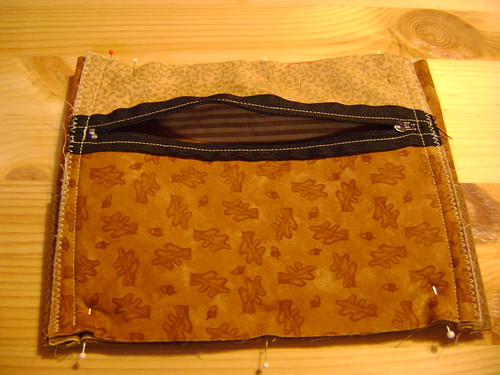
Open and turn one of the 2 sewn pieces.
Place finished side into the other finished side, you can see the raw edge outside.
Align and Pin.

Start sewing from one finished top, down the side, pivot, careful of the bottom seams, pivot at the side and back to the other finished top.
Back stitch at the start and stop.
Finish seams.
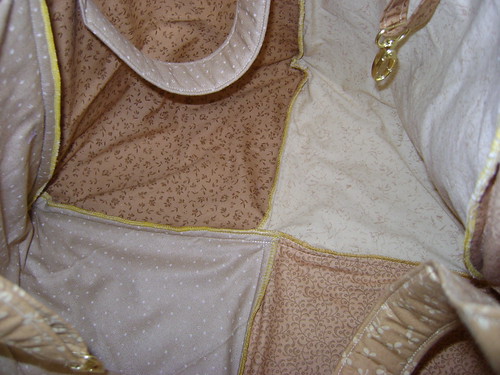
Detail inside bottom.

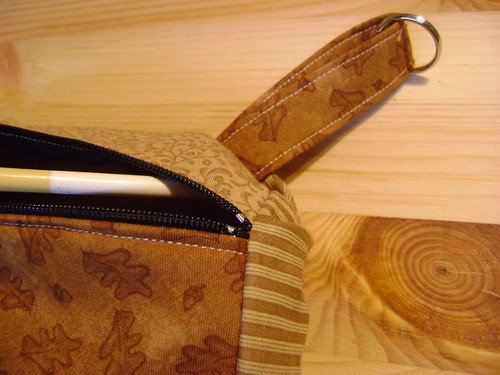
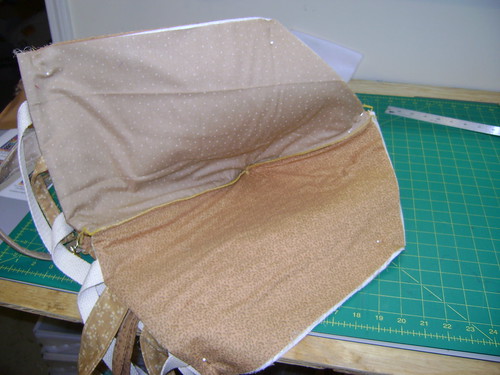
Top stitch around the top finished edge.
Make sure the swivel hooks are falling inside the bag.


Outside bottom detail.


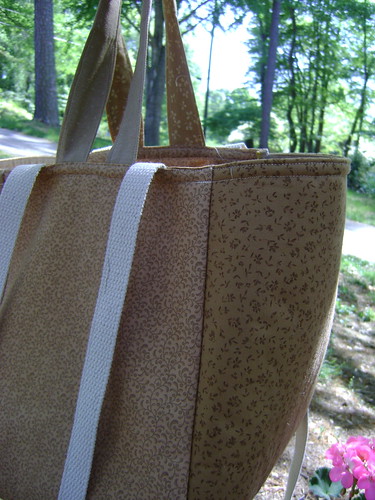
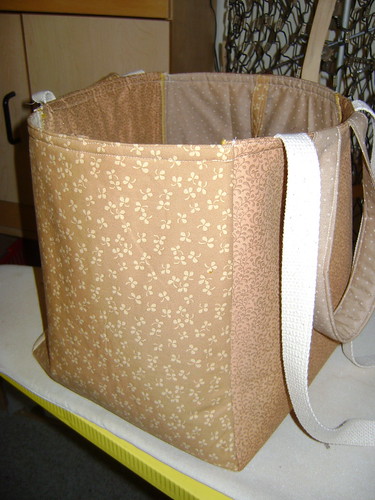
I am pleased with the bag. I used up about 2 yards of fabric. It stand up by itself. It is roomy with out being over large. Hopefully by next Saturday I will have the change purse with zipper and clasp ready so I can find my money to pay the farmers.

LinkWithin

Related Posts with Thumbnails